Friday, May 3, 2013

Grilled Lobster Stuffed Lobster


 What can I say ... Lobster, gill and butter are three of my favorite words.  This one is kind of a showstopper for presentation so hold on to your cocktails!

Ingredients:

1 Lobster
1 Lemon
Salt

smokey lemon butter (recipe below)

Description:

Fill a large pot of water (to cover your lobster), add about a cup of kosher salt and a lemon cut in half, and bring to a boil.  Once it has reached a rapid boil add the lobster.  Here it is better to think of the lobster as a sea cockroach if you feel the burden of guilt over throwing a live creature into boiling water.  Let him (or her) boil away for 5 minutes and immediately remove and place into an ice bath for 5-10 minutes.  Now remove the arms and claws by simply twisting and pulling and set aside. Cut the lobster equatorially, and clean, trying to remove as much water as possible and set aside.  Remove the claw meat and knuckle meat and place into the void in the shell left from cleaning.

Now for the smokey lemon butter ...

Combine the following and mix together:

1 stick unsalted butter, room temp
1 teaspoon garlic
2 teaspoons salt
1 teaspoon pepper
1 tablespoon lemon thyme
1 tablespoon lemon juice
1 teaspoon smoked paprika

Now brush about half of the butter onto the lobster and grill on medium for about 5-8 minutes, adding more butter halfway through cooking.


Steamed Mussles


Getting Started:
Mussels are hard-shell mollusks that live in both fresh water and salt water. They are one of my favorite appetizers because they can be packed with flavor, interactive to eat, and very light and non-filling!  The first step to cooking mussels is to discard any that are broken or dead.  I can tell you from personal experience that one thing you DO NOT WANT TO EAT is a bad mussel; it will make for a terrible next day!  I always think it best to be safe and discard any mussels in question.  So how do you know when a mussel is bad?  That's easy ... just soak them in cold water for about 15 minutes, drain, and discard any that are open and don't close when you flick them.  This means that they are dead ... throw them away!  Next you want to remove the beards.  Some mussels have stringy parts called beards.  Give these a yank towards the hinged end of the mussel to remove.  If you pull it the other way then you can rip the mussel and kill it.  Now give the mussels a look over and brush any that may have sand or barnacles or any other sea debris.  
Ingredients:
2 lbs Mussels, cleaned
3 Tablespoons EVOO
1 Shallot, minced
2 Cloves garlic, minced
1 Teaspoon crushed red pepper
1 Cup white wine
a dash of your favorite hot sauce
2 Tablespoons grated Parmesan cheese
2 Tablespoons heavy cream
2 Tablespoons fresh chopped parsley
some good rustic bread


Description:
All you really need to make steamed mussels is a large pot with half an inch of water in the bottom.  Everything else you add is really to enhance the flavor, but I know some people who prefer them with just salt and pepper.  I on the other hand, never miss an opportunity to layer some flavors!
Get your pot nice and hot, add the EVOO and Sauté the mussels, shallot and garlic for 3-5 minutes.  Next add a dash of your favorite hot sauce.  You want to only add enough to add a little complexity here, you don't actually want to taste hot sauce so only add a small dash.  Add the crushed red pepper flakes and white wine (I wonder the rest of that bottle is going to end up ... ).  Cover and let this steam for 5 minutes or so.  Next add the heavy cream, parmesan cheese and parsley.  Simmer uncovered for about 3 minutes.  Now dump into a nice bowl and serve with some rustic bread.  The natural broth that is made during cooking is often used as a sauce and is perfect for dunking bread!
Note:  Be sure to discard ay mussels that are closed when eating.  Two steps to not eating bad mussels: 1) ONLY COOK THE CLOSED ONES (pre-cooking),  and 2) ONLY EAT THE OPEN ONES (after-cooking) !


Monday, November 19, 2012

Rabbit Confit and Cassoulet


One of the most iconic french dishes, depending on where you call home in the french countryside, the cassoulet dish has varied ingredients.  Similar to the way Americans argue over methods of barbecue or recipes for chili, the people of France swear by their personal recipes for cassoulet.  There is even legend that this bucolic bowl of meat and beans saved the people of France during the Hundred Years War.  According to this legend the English invaded the french countryside and lay siege to a town.  With the defending french soldiers growing weary and the food stores dwindling, the townspeople decided to make a giant hardy stew of meats and beans to raise the energy and morale of their defenders.  The dish was so hardy and worked so well that the defending french soldiers drove out the occupying English!  Originally cooked over the hearth with the residual heat from the fire, today this delectable dish can be recreated in the modern oven in just a couple hours.

Rabbit Confit


Ingredients:

a 2.5 to 3 lb rabbit
2 to 3 cups vegetable oil
1 Tbsp truffle oil
3 cloves of garlic, minced
2 tsp chopped parsely
2 tsp chopped rosemary
2 tsp chopped sage
2 tsp thyme leaves
2 bay leaves
2 Tbsp salt
1 Tbsp peppercorns


Description:

Start by breaking down your whole rabbit into smaller workable pieces.  You can watch a chef do this here.  I had two front legs, two back legs, and two pieces from the saddle (or middle of the rabbit) and discarded the ribs and backbone.  Once your rabbit is broken down combine all of the ingredients in a bowl or dutch oven making sure the rabbit pieces are completely submerged in the oil.  Add more oil if you need to.  Let this marinade over night in your refrigerator.  After the rabbit has marinated preheat your oven to 300 degrees.  Place the dutch oven on the stove over medium heat and slowly bring the oil up to temperature.  Once the oil begins to shimmer and a few bubble begin to form cut the heat and cover.  Place into the oven for two hours.  Check halfway through to turn rabbit pieces and add more oil if necessary.  Once two hours has gone by, remove the dutch oven and place on stovetop uncovered to cool.  The rabbit should cool completely while remaining submerged in the oil.  Once everything is cooled the confit can be stored in a container where it is submerged in the oil and will last in the refrigerator for up to four weeks ... but it won't because it's so delicious!  Now that you have finished your confit it's time to make the cassoulet!

Rabbit Cassoulet

Ingredients:

confit meat from one 2 to 3 lb rabbit
2 cups Great Northern white beans, rinsed and soaked over night
2 yellow onions, diced
2 carrots, diced
1 celery stalk, diced
3 to 4 cloves of garlic, minced
cheesecloth
butcher's twine

2 whole cloves of garlic
1 bunch parsley
1 sprig rosemary
4 to 6 sage leaves
2 springs thyme
2 tsp whole peppercorns
1 14.5 oz can of diced tomatoes
1 6 oz can tomato paste
8 oz smoked sausage, thickly sliced on the bias

half of a french baguette (about the size of two fists)
2 cloves of garlic
1 small bunch of parsley
1/3 cup parmesan cheese
2 tsp fresh ground black pepper
4 Tbsp olive oil


Description:


Place a large dutch oven over medium-high heat and add about 2 Tbsp olive oil.  Once heated, add the onion, carrot, celery, and garlic.  Salt and pepper to taste and sauté until soft, about 5 to 7 minutes.  Add the drained beans and enough water to cover beans, chicken stock.  While waiting for this to come back to a boil make your garni bouquet by taking a piece of cheese cloth about 5 inches square, adding the whole garlic cloves, parsely, rosemary, sage, thyme, and peppercorns.  Wrap this up and tie with twine. Add it to the pot, cover, reduce heat, and slowly simmer for 40 minutes.  Uncover, remove garni bouquet, add diced tomatoes, and simmer another 10 minutes.  Remove about 2 cups of beans from pot with a little liquid and puree.  Add this back into the pot to help thicken. In a large skillet heat 1 Tbsp oil over high heat.  Add the smoked sausage and brown for about 5 minutes.  Add the pulled and/or diced duck confit and cook for another 5 minutes.  Remove from heat and add the meat back into the cassoulet.  Lower your oven rack to about 10 inches from the broiler and turn your broiler on high.  In food processor combine the baguette, garlic, parsley, parmesan, pepper, and last Tbsp of olive oil.  Process until the crumbles are about the size of oats.  Divide the cassoulet into single serving bowls, top with some of the bread topping, and broil until golden brown (about 5 minutes).

Tres Bon!


Two shootouts for this post: One shootout goes to Dylan and my friends, Tricia and Phil.  It is always so much fun when we get together and cook/eat/drink.  Love you  guys! The other shootout goes to a person I've never actually met, however I absolutely love her blog ... it can be found here.  Her blog is fantastic and she inspired me to make rabbit cassoulet.  Check her out!


Wednesday, November 7, 2012

Chocolate Chipotle Chili


Usually when one thinks of braising meats they don't really think of chili, at least I didn't until I ... well ... until I DID.  What is braising and why do people do it?  Well braising is simply taking meat (usually a tough cut) and browning it by searing, then cooking it low and slow in a low temperature closed moist environment for a lengthy time.  It is a process that's been around for a very long time.  In the very old days people used to cook by suspending a heavy metal pot over a fire to slowly braise their foods.  For more even heat people even placed embers from the fire below on top of the pot's lid.  Inside this metal pot meats and vegetables cooked low and slow in some liquid creating absolutely delicious dishes that take all that time and build wonderful character.  This dish is pretty easy to make.  Once you put it in the oven you have two whole hours to clean up, make a cocktail or pop a bottle of wine, and relax while it cooks away quietly in the old hotbox ... just don't finish the bottle and forget to take it out when it's done!


Ingredients:

about 2lbs of beef short ribs
1 large red onion, diced
1 green bell pepper, diced
1 red bell pepper, diced
2 tbsp finely chopped garlic
2 tbsp chili powder
2 tbsp smoked paprika
4 tbsp brown sugar
1 tbsp unsweetened cocoa powder
2 tsp ground cumin
about 16oz of beef stock
1 28oz can of beans (preferably black or pinto)
1 29oz can of diced tomatoes
3 or 4 finely diced chipotle chiles in adobo sauce
2 oz unsweetened baker's chocolate
1 bunch scallions


Description:

Preheat oven to 350 degrees.  Set your dutch oven on the stovetop with enough oil to lightly coat the bottom and turn the heat to high.  Let it get very hot.  Lay out your short ribs bone side down and generously salt and pepper them.  Place short ribs into the very hot dutch oven meat side down to sear, about 4 minutes per side. Remove the short ribs and set aside.  Place the onion and peppers into the pot and cook on medium high heat for about six to eight minutes.  Add the garlic, chili powder, smoked paprika, brown sugar, cocoa powder and cumin.  Turn the heat back up to high and cook for another two to three minutes.  Now add the beef stock and scrape any bits from the bottom of the pot. Drain and rinse the canned beans.  Add the beans, tomatoes with the canned liquid, the chipotle with adobo and the chopped chocolate.  Bring the whole mixture to a low simmer and add the short ribs back into the pot.  Nestle the ribs down into the mixture, cover and place in the oven for two hours.  Carefully remove the dish from the oven.  Carefully remove the short ribs from the dish and, on a separate plate, discard the bones and shred or chop the meat and return it to the pot.  Give one final stir and serve in a bowl with chopped scallions and rustic bread!


Sunday, November 4, 2012

Fall Apple Crisp


This is absolutely one of Dylan's favorite things that I make.  If you are like me or my friends you went apple picking this fall and had way too many apples for one household.  There are so many different ways to deal with that "problem" from applesauce to apple pie, but Dylan's favorite is apple crisp!  This dish is simple to make and the preparation takes about fifteen minutes from start to finish.  The best part is that it will patiently bake away in the oven giving you plenty of time to eat dinner and then be ready to jump straight into that anxiously waiting pie hole ... err ... apple crisp hole on your face.  LOL


Ingredients:
2-4 apples
1 lemon
1 orange
1/3 cup sugar
2 tsp cinnamon
1 tsp good vanilla extract

3/4 cup flour
1/3 cup sugar
1/3 cup brown sugar
1/2 cup oats
1 tsp salt
1 stick COLD butter (diced)


Description:

Preheat oven to 350 degrees.  Chop apples and place into large bowl.  I like to leave the skins on but you can peel the apples if you prefer.  Add the zest of the lemon and the orange to the bowl and juice half the lemon and orange, sugar, cinnamon, and vanilla.  Mix everything together and place into small baking dishes for individual servings or place into a large baking dish.  For the topping place the flour, sugar, brown sugar, oats, and salt into a stand mixer.  Mix on low for about 30 seconds to combine then add the diced butter and increase the speed a little.  Mix until the butter is about the size of small peas and the mixture is a little bit like gravel.

Place the topping onto the apples, place the baking dish(es) onto a sheet pan in case they bubble over while cooking, and place into the preheated oven for 45 minutes.  Once the time is up, remove the sheet pan and let it cool for about 10 minutes before serving ... unless you want to seriously burn the roof of your mouth!  I use this time to pull the vanilla ice cream out of the freezer and let it soften for a few minutes.  You can top this hot fall treat with a scoop of vanilla ice cream and maybe even a dap of whipped cream and impress your friends with your culinary expertise!


Tuesday, October 30, 2012


Brined and Grilled Pork Chops with Grilled Kale and Pineapple


This is a strange way to start this off ... but I love pizza.  I am a New Yorker relocated to Boston and I hang on to my New York roots by always dipping my pizza in blue cheese.  My favorite type of pizza .. Hawaiian of course!  I simply love the combination of ham and pineapple together.  Now when most people think of pork chops they tend to think breaded pork chops with mashed potatoes and applesauce. No disrespect to antiquated cookbooks, but that's boring by today's standards isn't it?  I was thinking about ordering a Hawaiian pizza and then started craving pork chops, but wasn't entirely over my craving for Hawaiian pizza.  I am also starting to cook more without the use of starches for an overall lower carb meal.  The result here was grilled pork chops with grilled pineapples instead of applesauce.  I also grilled some Kale because it tends to have a wonderfully salty flavor and salt is one of the reasons I love mashed potatoes.  So now we have an updated, Hawaiian, carb-friendly, non-breaded version of an old classic!  Now when you get the pork chops make sure they are thick (between an inch or two) and that they are still on the bone.  I like to have my butcher cut them for me.


Grilled Pork Chops
Ingredients:

2 thick cut/Bone in pork chops
1 cup cider vinegar
1/2 cup kosher salt
1/2 cup brown sugar
1 whole star anise
1 tsp caraway seed
2 tbsp black peppercorns
2 tbsp good mustard
2-4 handfuls of ice cubes

Directions:

Start by heating the vinegar in a small saucepan over medium high heat.  In a bowl, combine the salt, brown sugar, anise, caraway seed, black peppercorns, and mustard.  Once the vinegar is good and hot (just starting to simmer) add it to the bowl and stir to help dissolve everything.  Let it sit for about fifteen minutes and then add the ice cubes to chill everything down.  Place the pork chops into a bowl or ziptop bag and pour the now chilled liquid to completely cover the chops.  Let these sit in the refrigerator for between two and three hours. Place on a searing hot grill for three four minutes, turn ninety degrees and leave for three minutes.  Flip and cook for four minutes, turn and cook for three minutes.  Remove from grill and let sit for five to ten minutes before cutting.


Grilled Pineapple
Ingredients:

1 pineapple

Directions:

Remove the top and bottom of the pineapple, then cut off the skin.  Once skinned, half lengthwise and then half again lengthwise.  Now holding your knife at a forty-five degree angle cut away the core from each quarter of the pineapple and cut into chunks.  Place these onto a searing hot grill for about four minutes on each side (eight minutes total).  The pieces should be charred.


Grilled Kale
Ingredients:

1 large bunch of kale
1/4 cup olive oil
2 tsp salt
2 tsp fresh cracked pepper
2 tsp red pepper flakes

Directions:

Remove and discard the stalks from the kale leaves.  Cut leaves into large irregular pieces and toss in a bowl with other ingredients.  Grill in a wire basket over medium to high heat for about eight to ten minutes or until the leaves start char.  Remove from the grill and enjoy with your pork chops and pineapple!


Thursday, September 6, 2012

Grilling and You ...


Summertime, and for some (Dylan) even the dead of winter, is the best time for grilling.  There is something truly visceral about stepping outside, exerting your dominion over fire, feeling the wind on your face, and of course cracking open a beer!  We feel connected to our food.  And yes there is also that connection to an intricate meal that was perfectly prepared indoors ... but this is different.  This is carnal.  We are cavemen.  This is GRILLING!

Ever since our South Boston roof deck grill became "legal" by converting it to natural gas and having it hooked into the house gas-line (I think the legality has something to do with holding that ticking time bomb of a propane tank on a city roof ...) I have been obsessed with grilling everything and anything.  Meat, Fish, Vegetables, Cedar Planks, Par-Baked Breads, Searing, Roasting ... you name it and I've probably tried to grill it.  Heck, I have even grilled Dylan's famous spinach and artichoke dip!

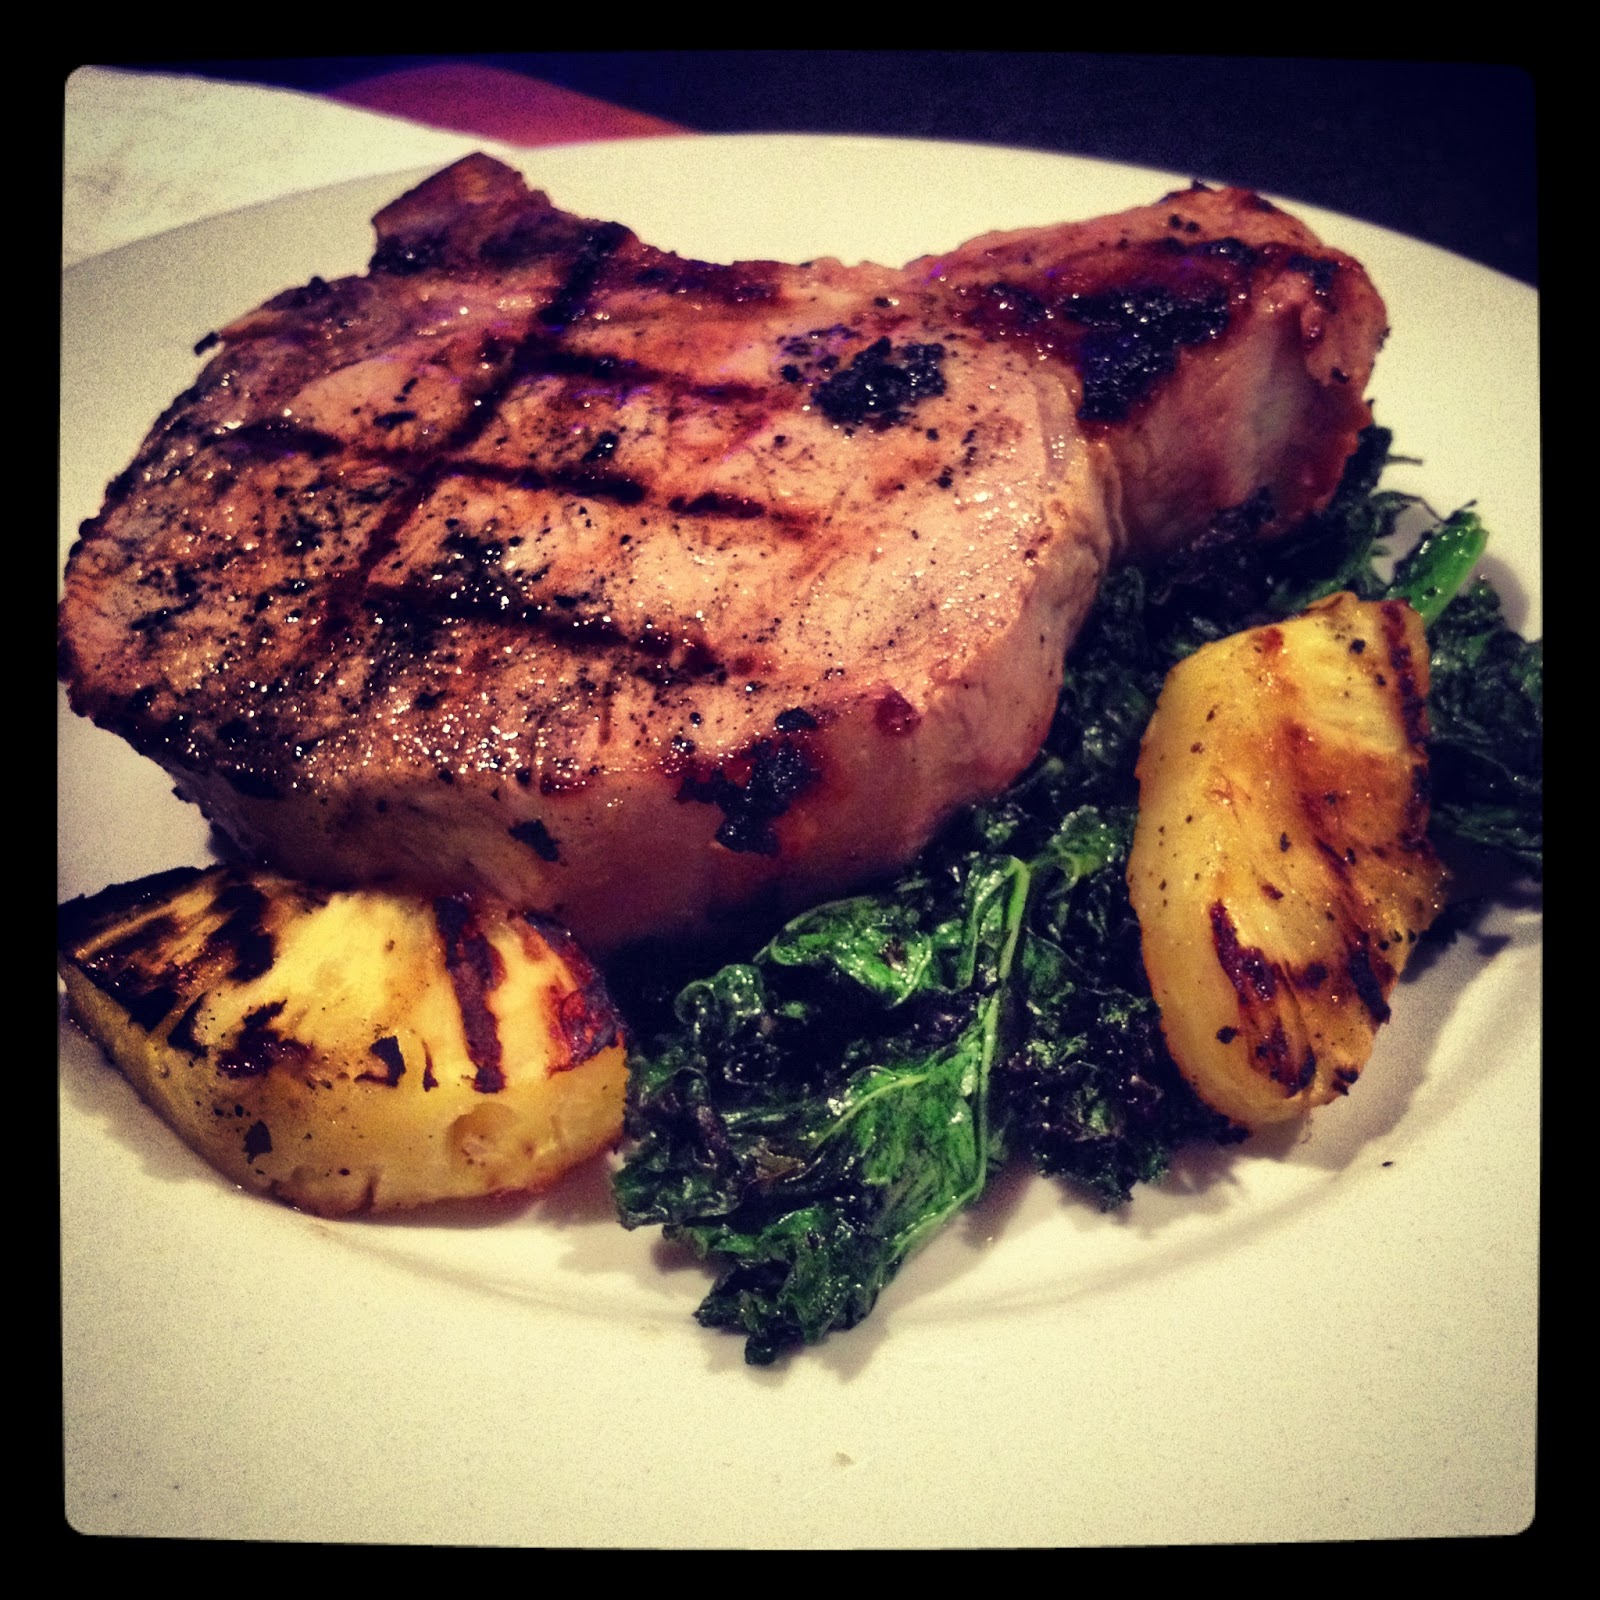
Now I know that in Texas when you grill you think beef, but for this post I'm going the Carolina route and I'm talking about grilling pork.  If you think back to the colonial days, when pigs and cattle were the main sources of meat imported to the growing american colonies, there were a lot of slaves to be fed in the Carolinas.  One of the reasons that pork was so popular in that region at that time was due to the fact that pigs, unlike cows, were valued for being such low-maintenance animals.  Two great things about fast forwarding to today ... no more slavery AND we love to grill pork!

Grilled Pork Loin

Ingredients:

1 meat thermometer
1 roll of butchers twine

1 medium pork loin (5 lbs)
1 Tbl garlic
2 tsp ground coriander
2 tsp salt
2 tsp cracked black pepper
2 tsp chopped thyme
2 Tbl chopped rosemary
1-2 Tbl truffle oil

Directions:

You want to rinse and pat your pork loin dry with a paper towel or two before laying it down on your PLASTIC cutting board that is never used for food you will eat raw.  In my home, and most restaurants, all foods that are consumed raw like veggies and cheeses or previously cooked meats that pose no threat of contamination can be placed on wooden cutting boards.  Anything that has a harmful "bug" in it like raw meats and fish GO ON A PLASTIC CUTTING BOARD and placed into the dishwasher afterwards! Ok ... I'll stop yelling at you.  Now that you have your cleaned loin resting on the plastic cutting board it needs to be trussed.  If you've never trussed anything before then watch this video:
http://www.youtube.com/watch?v=tWxOJbMdU48

Now that you are an expert at trussing and your pork loin has been trussed, combine all of the other ingredients into a rub and generously coat all sides of the pork.  Turn one side of your grill to high heat and let it preheat with the cover closed.  Once searing hot, place your pork loin over the heat to sear all sides for about one to two minutes per side.  Once seared, move the pork to the other side of the grill (the indirect heat side) and turn the burners on the other side to low and close the lid.  The pork should take about one to one and a half hours to roast.  Remove from the grill when the interior temperature reaches 145 degrees and set aside to rest for ten to fifteen minutes.  This allows the juices to redistribute and calm down and also allows the internal temperature to climb to 155/160 degrees.  Once rested, remove the butchers twine and slice to serve!  ENJOY!!


Don't forget to pair the pork with a light to medium bodied earthy wine, such as a pinot noir from the Pacific Northwest region ... especially if you're special someone's alma matter is from that region!  ;o)